
Voo Doo Doll Necklace
By Lux
Difficulty: 1 out of 5
Materials:
6 2.5 inch nails
1 dense piece of craft Styrofoam at least 1 inch thick and 5 inches round (or square)
1 ball of twine
Pen or marker
Craft glue or a hot glue gun
Ruler
Pin
Large plastic needle
Chain (optional)
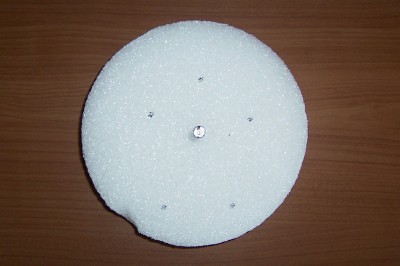
1) Find the center of your Styrofoam piece and mark it. Push one nail into the. The deeper your nail goes the sturdier your frame will be, but make sure enough of the nail is protruding to loop the twine around. Measure and mark 5 points coming out from the center. Three should come out by about 1¼ inch (or more if you want a bigger doll). And two of them should be about ½ inch longer. The longer two will be the legs. (photo)
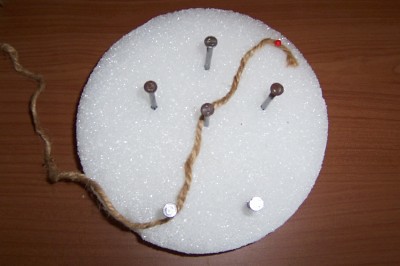
2) Push your remaining nails into these points. You’ve just made your frame. (photo)
3) Pull out about 4 inches of twine and secure the end of it to the Styrofoam with a pin. (photo)
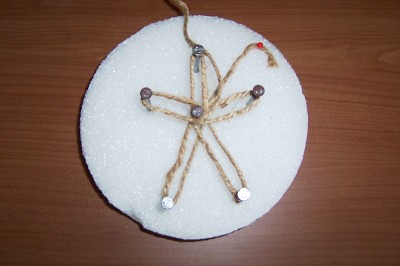
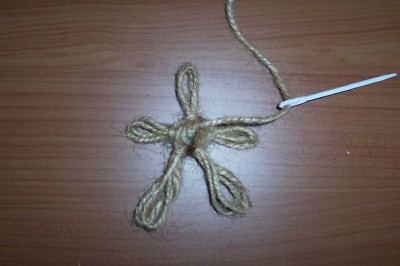
4) Begin to loop your twine through the frame in a “flower” type pattern. The loops should be firm but not too tight. Pulling too tight may cause the nails to shift. (photo)
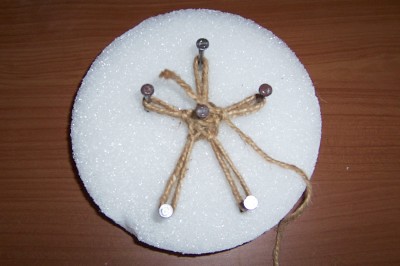
5) Once you’ve looped every outside nail 2 times (or more if depending on the thickness of your twine), pull out about 18 inches of twine from your ball and cut. Wrap this loose end around each of the 5 “limbs” tightly. Go around twice. Remove the pin and tie the two loose ends together forming a secure knot. (photo)
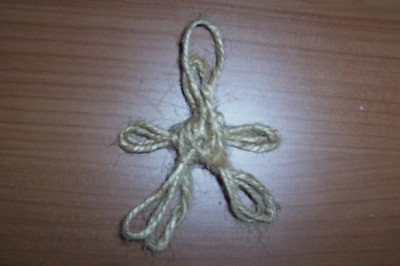
6) Very carefully, slide the nails out of the Styrofoam. Remove all but the center nail. Carefully, use the plastic needle to thread the longer loose end through the center of your doll while removing the center nail. (photo)
7) This longer loose end will become the opening through which you thread your chain, or string later. The loop opposite the legs will be your head. Loop the loose end over it so that it is about ¾ inch longer than the head loop. (photo)
8) Secure this end by tying it to the shorter end in a tight knot. Trim the end to about ¼ inch. (photo)
9) Pull out a few inches of twine and use the plastic needle to thread the end through the middle of you doll. Wrap this end around the head once and tie into a knot. (photo)
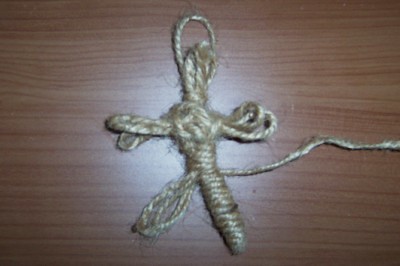
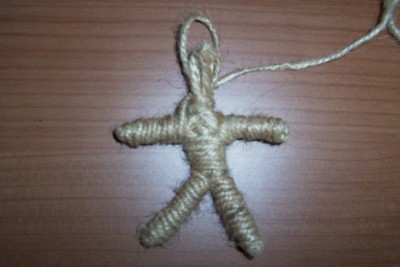
10) Make the lower torso by bundling the legs together and wrapping for about ½ inch. (photo)
11) Pick one leg and begin wrapping it all the way to the end. Reverse the direction and wrap it back to where it meets the torso. (photo)
12) Do the same to the other leg. When you get to the torso continue wrapping up to where the arms meet the chest. (photo)
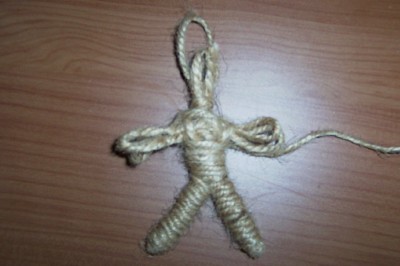
13) Choose an arm and begin wrapping it. When you reach the end reverse your direction until you get to the chest. Wrap the other arm the same way. (photo)
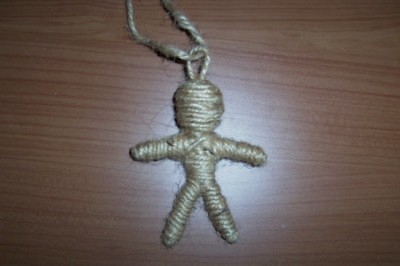
14) Begin wrapping the head. To make it round concentrate on the middle of the loop. Don‘t forget to leave a part of the longer loop sticking out so you can thread you chain through. (photo)
15) To finish cut the twine about 6 inches away from the doll. Use the plastic needle to weave the loose end into the chest. Trim the end. Use hot glue or a clear drying craft glue to secure all your ends and loops. String your doll on a chain or extra twine or even ribbon. The choice is yours! (photo)
Tips:
-When wrapping, do it as tightly as possible so your work doesn’t come undone.
-The thinner the twine you use, the more control you have over what your doll will look like, but you may have to do more wrapping to get it thick enough.
-Securing the ends of you limbs with craft glue is not necessary but it will make sure your doll lasts a good long time.
Variations:
-You can use other colors of twine to add details such as clothing.
-Hair can be added by using a plastic needle and some yarn or embroidery floss.
Once you get the hang of making these you can even alter the frame and adjust your wrapping technique to make animals like turtles or giraffes.
I showed you mine, now show me yours!

1 comment:
Ooooo that looks so cool! I'm going to have to try that! You could even add wings on and have little angels. Thank you!
Post a Comment