Showing posts with label tutorial. Show all posts

Tuesday, November 25, 2008

Tutorial: Off The Shoulder Crop Top (w/ sewing pattern)


80’s Off The Shoulder Crop Top

By Lux


Difficulty 2 out of 5


Materials:
Girl Is Poison Sewing Pattern: Piece 1 & Piece 2
1 yd stretch fabric (cotton knit works great)
Sewing machine or serger
Scissors
Pins
Thread

1) Wash and dry fabric to preshrink.


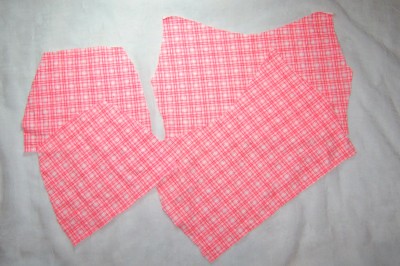
2) Print out the pattern pieces on standard size paper (8.5X11“). Cut them out along the bold black lines. Since these may not print exactly the same on all printers you may need to extend the lines to the very edges of the paper and then cut. Your pieces should end up looking like this: photo.


3) For S/M cut out your top pieces following the directions on the pattern and mark the symbols (stars, bolts, “flashes”). For M/L add 2” to each piece width wise. You should end up with 4 pieces: 2 sleeves, 1 back and 1 front. (photo)


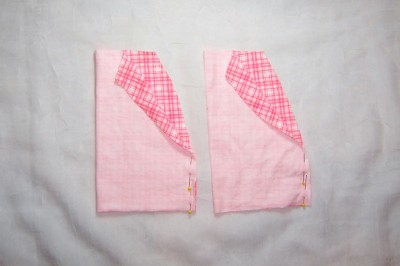
4) Take one sleeve and with the right side facing in match up the ends with the flash symbols and pin. Do the same to the other sleeve. (photo)


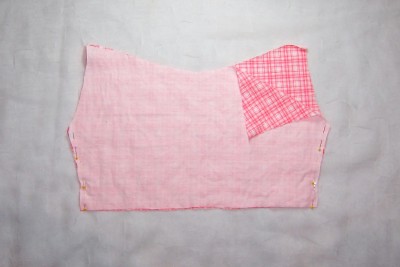
5) With right sides facing each other pin your front to your back matching the edges at the star symbols. (photo)


6) Sew the pieces where you have pinned them 5/8” from the edges. Sergers work great for stretchy fabrics, but if you don’t have one you can use a straight stitch. Just set it to a longer length and lower the tension a bit. Or if you prefer, you can use a zigzag stitch to prevent fraying depending on the type of fabric you are using. (photo)


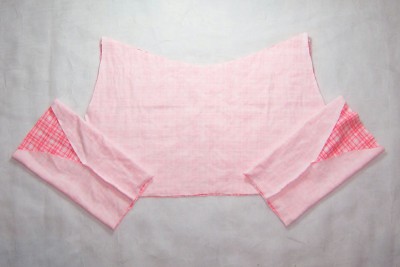
7) With right sides facing each other, pin your sleeves to your top matching the edges with the lightning bolts. Make sure your underarm seam matches up directly with your side seam. (photo)


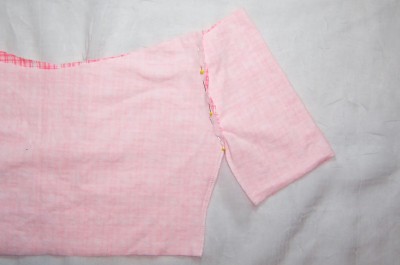
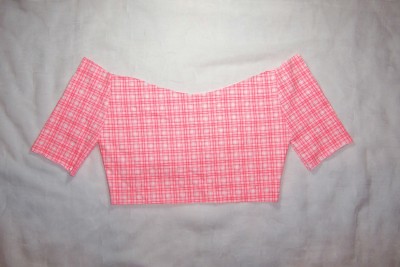
8) Sew the sleeves onto your top 5/8” from the edge. Turn your top right side out and it should look like this: photo.


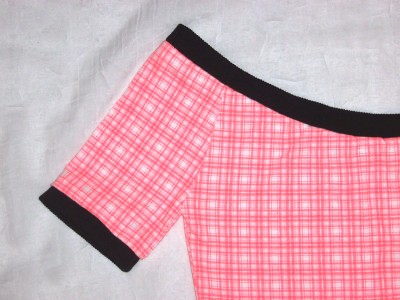
9) At this point you can finish the edges a couple of different ways. You can do a traditional hem by folding the edges over and straight stitching. You can serge the edges for a DIY look or leave them raw. OR you can band them like I did. (photo)


Adding Bands with Knit Fabric


I recommend banding. It makes the top look more polished and it’s super easy to do. To finish your edges by banding you will need to cut out long strips of the same type of fabric. You can use a contrasting color like I did, but make sure it is the same type of fabric or at least very similar.


First decide how wide you want the band, double that and add 1 ¼“. Next measure the edge you would like to band. You can do this by laying the top flat, measuring across doubling that measurement and subtracting 1“. Use these measurements to determine the size of the strips you will cut out. Do not add anything to the length for allowance, you want the band to be slightly smaller than the edge so it fits against you snugly. For example: my neckline measured 16” straight across and I wanted a 1” band so I cut out a piece measuring 3 ¼” by 37”.


Next, with right sides together, sew the two ends of the band together 5/8” from the edge. Turn it right side out, fold it in half lengthwise and iron it flat. Pin the band to your top matching the raw edges. Sew the band to your top. Since the band is slightly smaller you will have to stretch it a bit as you sew. Don’t stretch too much though or you’ll get an uneven look.


Repeat these steps for each edge and there you have it. Your 80’s off the shoulder top is done. Now you can break out your bicycle shorts and layer your top over a sports bra. Don’t forget the sweatband! :)


Tips:
~As with any pattern you may have to alter it to fit your body the way you like. One way to do this is by adding darts in certain places.
~You can also cut one or both of the pattern pieces smaller or bigger.
Variations:
~You can make a mini dress by lengthening the Front/Back piece by a few feet.
~Or make a long sleeved top by lengthening the Sleeve piece.
~You can add interest to your top by cutting the sleeves in different fabric.

Monday, November 24, 2008

Tutorial: Yarn Falls

Create an 80's punk hairstyle (like Cyndi Lauper's!) without dying your hair. Another awesome video tutorial by Emily from The Other Scene:


Check her out here: TheOtherScene.com & The Other Scene on Etsy

Thursday, November 20, 2008

Tutorial: Friendship Bracelet


Basic Friendship Bracelet
By Lux

Difficulty: 1 out of 5

Materials:
Embroidery floss (in several colors or just a few or even just one, you choose)
Clipboard
Scissors
Your creative genius!

1) Measure out about 20 inches of embroidery floss and cut. This should give you plenty of “breathing room” in case you make a mistake and have to cut off and start over. Cut a few more 20 inch pieces. How many depends on how wide you want your bracelet. (I used 6 and ended up with a ¼ inch wide bracelet.) (photo)

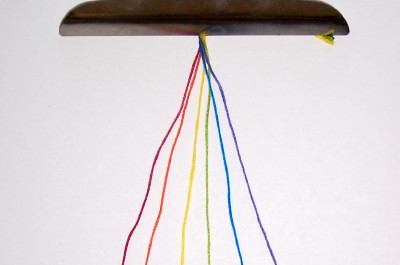
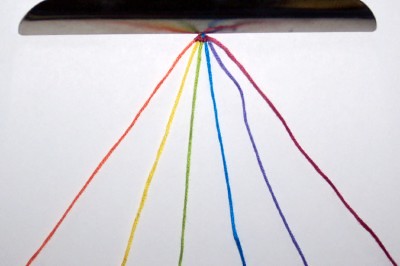
2) Tie your floss pieces in a knot about 3 inches from the end and clip the knot onto the clipboard. This will help stabilize your bracelet while you make it. (photo)

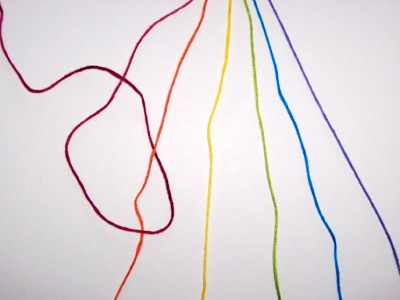
3) If you have more than one color, choose a color to make the first row. (I chose red.) If not, pick any piece to begin. This will be string #1. Wrap this string around the string next to it (string #2, orange in the picture) in a clockwise motion (photo) and pull through. (photo)

4) Wrap the next string in the row (string #3, yellow in the picture) in the same clockwise motion. Continue on down the row until you have wrapped string #6 (purple in the picture). (photo)

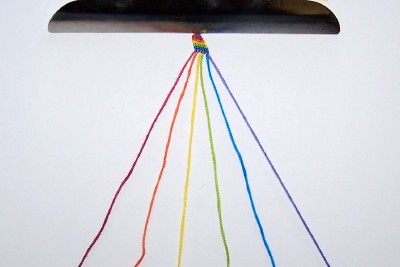
5) You have made your first row. Repeat the wrapping process with string #2 (orange in the picture), string #3 (yellow in the picture) and so on. (photo)

6) Continue on in the same pattern until your bracelet is as long as you need it. Tie off the end and cut leaving about 3 inches past the knot. This will give you plenty of slack to tie the bracelet onto your best bud.

Tips:
-The more strings you add the longer they have to be in order to ensure a long enough bracelet.
-Keep your knots tight, this will help make the texture nice and even.
-These bracelets tend to twist. You can flatten them out by using an iron on a medium heat setting.
-To keep the individual threads of the embroidery floss from separating you can wax them first using a recently lighted candle.

Variations:
Try for a friendship necklace or a belt if you have the patience!

Monday, October 27, 2008

Tutorial: Painting on Fabric

Here is a two part video tutorial from Emily. I tried fabric painting a couple times but never got the results I wanted. Here Emily shows you the right way to do it! Enjoy!

Fabric Painting
By Emily

Part 1


Part 2


Learn more about Emily here: The Other Scene (official site) and The Other Scene on Etsy!

Sunday, October 26, 2008

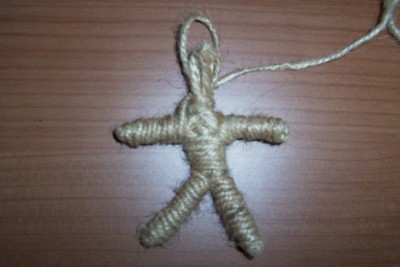
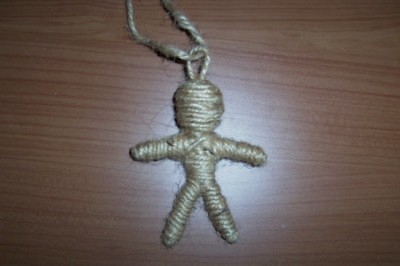
Tutorial: Voo Doo Doll Necklace


Voo Doo Doll Necklace
By Lux

Difficulty: 1 out of 5

Materials:
6 2.5 inch nails
1 dense piece of craft Styrofoam at least 1 inch thick and 5 inches round (or square)
1 ball of twine
Pen or marker
Craft glue or a hot glue gun
Ruler
Pin
Large plastic needle
Chain (optional)

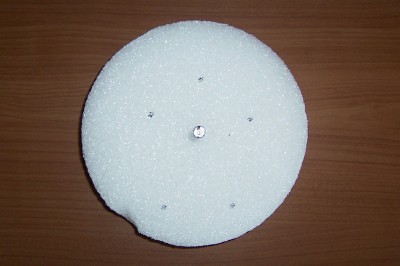
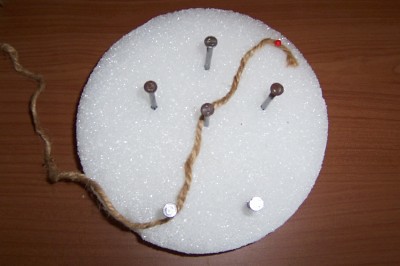
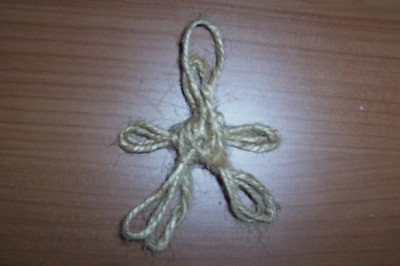
1) Find the center of your Styrofoam piece and mark it. Push one nail into the. The deeper your nail goes the sturdier your frame will be, but make sure enough of the nail is protruding to loop the twine around. Measure and mark 5 points coming out from the center. Three should come out by about 1¼ inch (or more if you want a bigger doll). And two of them should be about ½ inch longer. The longer two will be the legs. (photo)

2) Push your remaining nails into these points. You’ve just made your frame. (photo)

3) Pull out about 4 inches of twine and secure the end of it to the Styrofoam with a pin. (photo)

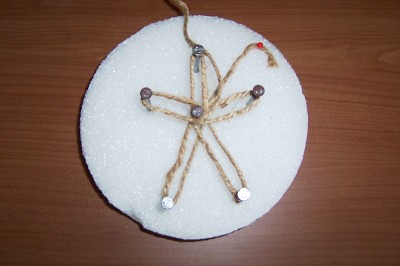
4) Begin to loop your twine through the frame in a “flower” type pattern. The loops should be firm but not too tight. Pulling too tight may cause the nails to shift. (photo)

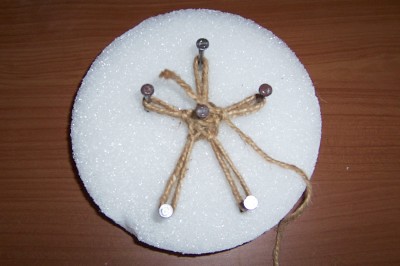
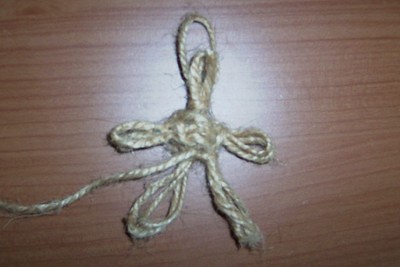
5) Once you’ve looped every outside nail 2 times (or more if depending on the thickness of your twine), pull out about 18 inches of twine from your ball and cut. Wrap this loose end around each of the 5 “limbs” tightly. Go around twice. Remove the pin and tie the two loose ends together forming a secure knot. (photo)

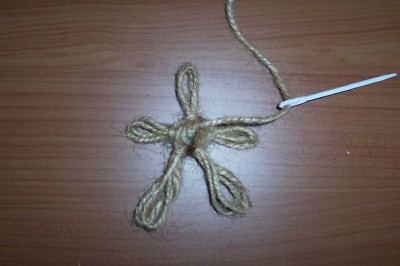
6) Very carefully, slide the nails out of the Styrofoam. Remove all but the center nail. Carefully, use the plastic needle to thread the longer loose end through the center of your doll while removing the center nail. (photo)

7) This longer loose end will become the opening through which you thread your chain, or string later. The loop opposite the legs will be your head. Loop the loose end over it so that it is about ¾ inch longer than the head loop. (photo)

8) Secure this end by tying it to the shorter end in a tight knot. Trim the end to about ¼ inch. (photo)

9) Pull out a few inches of twine and use the plastic needle to thread the end through the middle of you doll. Wrap this end around the head once and tie into a knot. (photo)

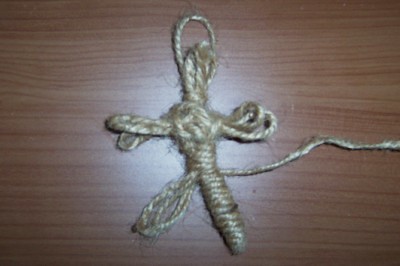
10) Make the lower torso by bundling the legs together and wrapping for about ½ inch. (photo)

11) Pick one leg and begin wrapping it all the way to the end. Reverse the direction and wrap it back to where it meets the torso. (photo)

12) Do the same to the other leg. When you get to the torso continue wrapping up to where the arms meet the chest. (photo)

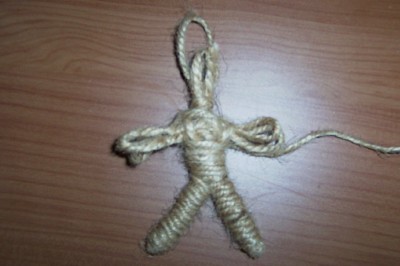
13) Choose an arm and begin wrapping it. When you reach the end reverse your direction until you get to the chest. Wrap the other arm the same way. (photo)

14) Begin wrapping the head. To make it round concentrate on the middle of the loop. Don‘t forget to leave a part of the longer loop sticking out so you can thread you chain through. (photo)

15) To finish cut the twine about 6 inches away from the doll. Use the plastic needle to weave the loose end into the chest. Trim the end. Use hot glue or a clear drying craft glue to secure all your ends and loops. String your doll on a chain or extra twine or even ribbon. The choice is yours! (photo)

Tips:
-When wrapping, do it as tightly as possible so your work doesn’t come undone.
-The thinner the twine you use, the more control you have over what your doll will look like, but you may have to do more wrapping to get it thick enough.
-Securing the ends of you limbs with craft glue is not necessary but it will make sure your doll lasts a good long time.

Variations:
-You can use other colors of twine to add details such as clothing.
-Hair can be added by using a plastic needle and some yarn or embroidery floss.
Once you get the hang of making these you can even alter the frame and adjust your wrapping technique to make animals like turtles or giraffes.


I showed you mine, now show me yours!

Saturday, October 18, 2008

Tutorial: Mummy Shirt

This tutorial was submitted to my Live Journal community Sew Underground a few years back. It's an oldie but a goodie. It's very easy to do and makes a really cute shirt. Enjoy!


By "Razorhappy" on LJ

What you need:
-Five (5) panels of Mummy fabric for the torso.
~Three (3) narrow panels for the front.
~Two (2) wide panels for the back
-Two (2) smaller panels of Mummy fabric for the sleeves.
-Bias Hem Tape for the neckline.
-Black ribbon, or in a matching color for the back tie.
-Long rectangular piece of T-shirt material in a matching color for the waistband.

Pointers:
~Throughout this project I tried on the shirt to make sure it looked just right.

Step 1: Make torso figure 1
~Sew together the 3 narrow pieces together to form the front of the shirt.
~Sew together the 2 wide pieces together to form the back of the shirt.
~Sew the front and back together to form a tube top.

Step 2: Add sleeves Try on the tube top to find the right places to add the sleeves!!
~Sew the 2 smaller panels on the tube top for sleeves
~Sew in dart at the top of the sleeve, (where it poofs off your shoulder)
~Cut off excess from the dart to arm pit.

Step 3: Adjust neckline figure 2: the red is where to cut
~Cut out V-shape from one sleeve to the center to the other sleeve.
~Repeat to the back of the shirt.

Step 4: Add details figure 3
~Add hem to neckline. (See figure 4: the red is where to sew! To make the point at the neckline: unfold the bias tape, then fold the tape in half, vertically. It should now be completely inside out. Sew an angle where the point goes towards the rest of the tape, away from the fold. When you fold it back to right side out, it should have a point now sewn in!)
-Then add ribbons to the hem tape on the back!!!
~Add waistband.
~Hem everything else!!

Tuesday, September 30, 2008

Issue #1: Super Cute!


Model: Mariska
Photographer: ?

Dear Readers,

I see there are at least two of you so far. Hopefully more will join us soon. Today I will begin posting Girl Is Poison: The Zine here. I will post at least one item per day until it's all out there for you to see. I have been working on this for about the last two and a half weeks. I would have started sooner but, well, life gets in the way! I did have a ton of fun putting this together. I got to try some new things and dust off my writing skills. There's small amount of content now, but I hope to grow this into something more. My goal is to get more people involved.


The theme of this issue is "Super Cute!" I have an interview with t-shirt designer SoHoKiTtEn, a music review, a tutorial, and more. I even try out a product so you know what you're getting before you buy.


My aim here is to have fun and produce an informative and entertaining zine. If you have any suggestions for things you'd like to see me cover fill out the poll to the right or comment. I'm also very open to submissions! I'd love submissions, so if you'd like to add the the zine please email me: thatgirl a t girlispoison d o t net.


Thanks for reading and I hope you enjoy it!


Lux

Sunday, September 21, 2008

Tutorial: Two-Tier Petticoat Mini


Difficulty: 2 out of 5

Materials
1yd cotton weave or other non stretch fabric (more depending on your size and preferred length of skirt)
1 pc 1/2in wide elastic (length should be your exact waist measurement end to end)
Trim (optional)
Thread
Pins
Sewing needle
Sewing machine
Iron
Scissors
Tailors chalk
Straight edge
Measuring tape


1) Wash and dry fabric to preshrink, then iron.
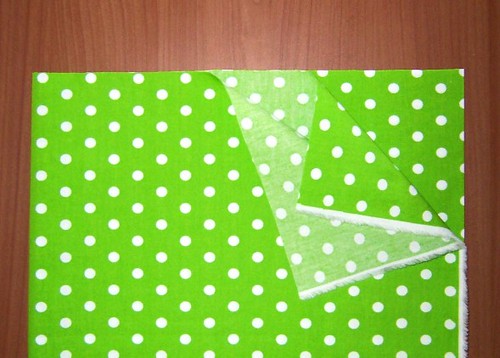
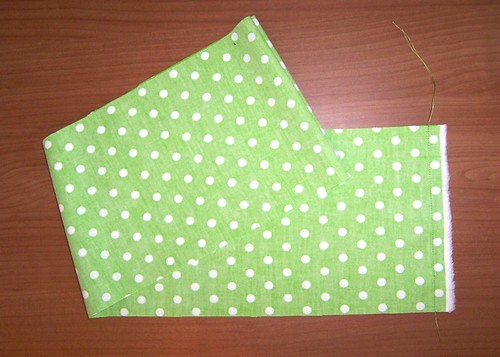
2) Fold fabric in half lengthwise and then fold in half again lengthwise. You’ll end up with four layers. (photo)
3) Measure and mark 6 inches from raw edge of fabric with a straight edge. Cut directly on line. *This will make a S/M variable size skirt. For a larger skirt see alternative waistband construction below.* (photo)
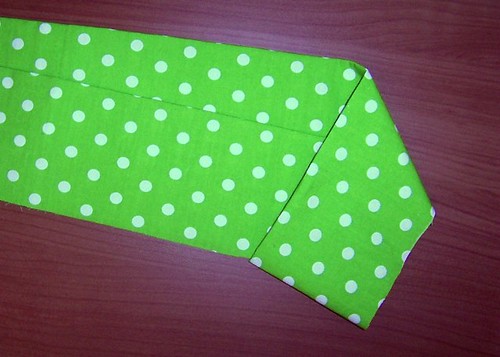
4) With right sides facing each other, sew together short ends 5/8 of an inch from edge. (photo)
5) Fold fabric over with the right side facing out and press. Now you have the beginnings of your waistband. (photo)
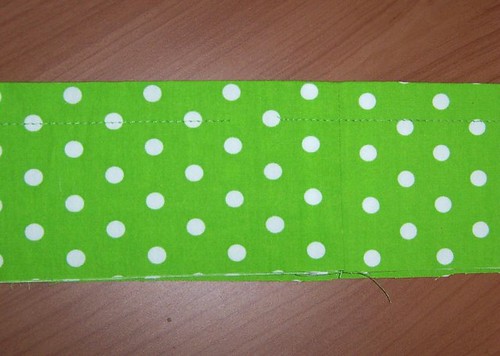
6) Sew a straight stitch 5/8 of an inch from pressed edge. Leave about an inch long opening to put your elastic through. This will be your casing. Set aside. (photo)
7) Cut the remaining length of fabric in half width wise. You’ll end up with two long equal sized pieces. (photo)
8) With right sides facing each other, sew the two pieces together 5/8 of an inch from the edges. This will be the lower part of the skirt. (photo)
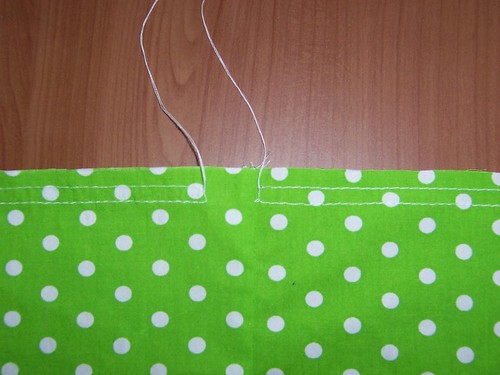
9) Set your machine to it’s longest stitch length and reduce the tension by half. Sew 2 rows of straight stitches about ¼ inch from one of the edges. These should be about ¼ inch apart. Tie the ends into two knots. (photo)
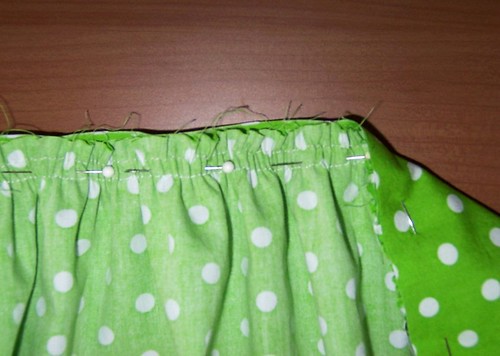
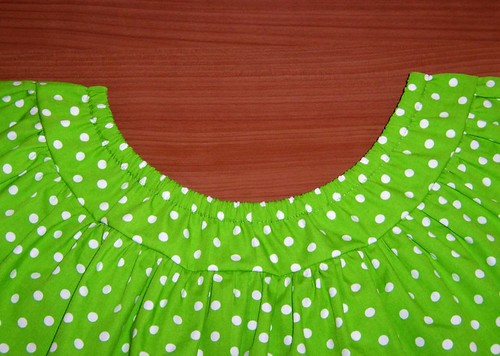
10) Pull on one of the knots until the lower part of the skirt is gathered to fit the waistband. Even out your gathers. (photo)
11) Restore original stitch length and tension settings on your machine. With right sides facing each other, pin lower skirt to waistband matching seams with sides. (photo) Straight stitch 1 inch from the edge leaving a 1 inch opening parallel to the 1 inch opening in the casing. (photo)
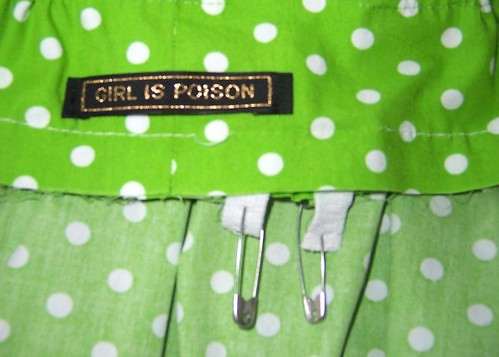
12) Attach a safety pin to each edge of elastic and thread elastic through the openings and all the way through the casing. (photo)
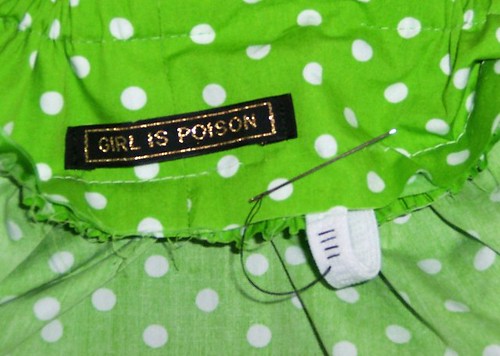
13) Pull elastic ends through, overlap them 1 inch and hand stitch them together. (photo)
14) Tuck elastic back into the casing and finish the casing seam. (photo)
15) Finish the seam attaching the lower skirt to the waistband. (photo)
16) Hem the skirt by folding over the raw edge twice at least ¼ inch, pressing it and straight stitching. (photo)
17) For an extra girly touch add trim. Still not cute enough? Add bows too!

*Alternative waistband construction: Begin by cutting two pieces of fabric 6 in from the edge instead of one. Cut each of those pieces to measure ½ of your total hip measurement plus one inch. Example: if your hip measurement is 46 in each piece should measure 24 in. Sew the two pieces together with right sides facing each other ½ in from each short edge. Fold over so right sides face out and press. Move on to step 6.

If you'd like to see the photos all at once please visit my Flickr page.

If anything isn't clear or you need a more detailed description don't hesitate to ask! This is only my first tutorial so I want to make it as easy to follow as possible.

Not the sewing type? Petticoat is for sale here.